Mandatory Filing Prompt
Smart Mail Organiser (SMO) has a Mandatory Filing Prompt feature where it proactively prompts you to save your sent email to KRIS. This feature is only available to you if your KRIS role(s) are configured for it.
Who will be prompted to file?
Users holding certain role(s) in the system can be configured to be prompted to file. The setup of mandatory filing prompt can only be done by User Administrators (UA) or System Administrators (SA).
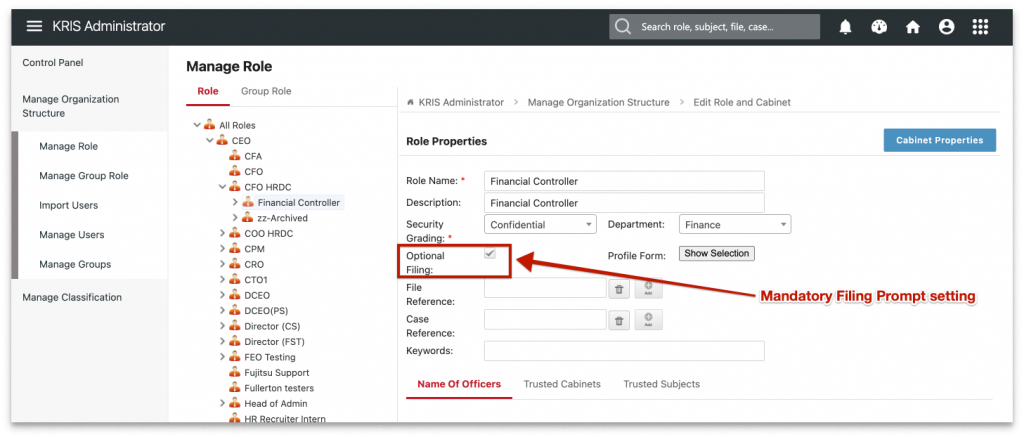
- Click on Module Switcher at the top bar and select KRIS Administrator module.
- Click on Manage Role link under Manage Organization Structure section.
- Expand the All Roles tree view.
- Right click on the role that the user is currently holding and click on Edit option.
- Under the Role Properties, tick the “Optional Filing” checkbox if you require users holding this role to be prompted to file the sent emails.
- Optionally, Admin can also specify a default File Reference for the mandatory filing using the File Reference field.
- If the default File Reference is not defined, SMO will select the most recent file reference that the user has used to file email in Outlook as a default.
How does mandatory filing prompt work?
Mandatory filing prompt is applied to the following scenarios:
Scenario 1: When user sends a new email
- Click on “New Email” to compose your email. A right panel called “Saving to KRIS” automatically appears. This panel allows you to set the file reference to save the email after sending it.

- If you click on Send without specifying any file reference, SMO will prompt you that you have to choose a file reference first.
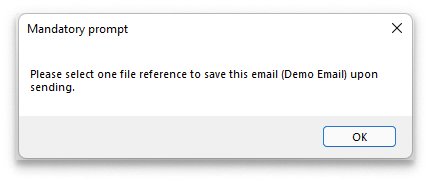
- To continue sending, you must make a decision, either to specify a file reference, or to not save this particular email.
- To specify a file reference:
- On the “Saving to KRIS” panel, click […] to browse for a file reference

- Select a file reference from your favourite files, recent files or browse the file plan. After selecting, the file reference will be displayed on the filing form.
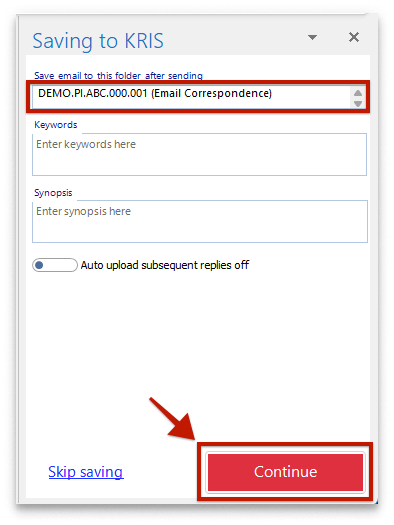
- Click on Continue. A pop-up appears to save your selected file reference. Note: This only saves the filing setting, the email has not been uploaded to KRIS

- Click on Send to send the email
- After sending, SMO will save the sent email to the selected file reference in KRIS
- On the “Saving to KRIS” panel, click […] to browse for a file reference
- To not save this email:
- Click on Skip Saving

- Click on Send to send the email
- Click on Skip Saving
- To specify a file reference:
Scenario 2: When a user replies / forwards an email
- When you are replying / forwarding an email and click on Send, SMO will prompt you to click on “Pop Out” to select a file reference before sending.

- After clicking on “Pop Out”, you will see the full Outlook Compose window. Here is where you can select a file reference using the “Saving to KRIS” panel.

- To save this email to KRIS after sending:
- Select a file reference
- Click on Continue
- Click on Send to send your reply.
- To not save this particular email:
- Click on Skip Saving
- Click on Send to send your reply.
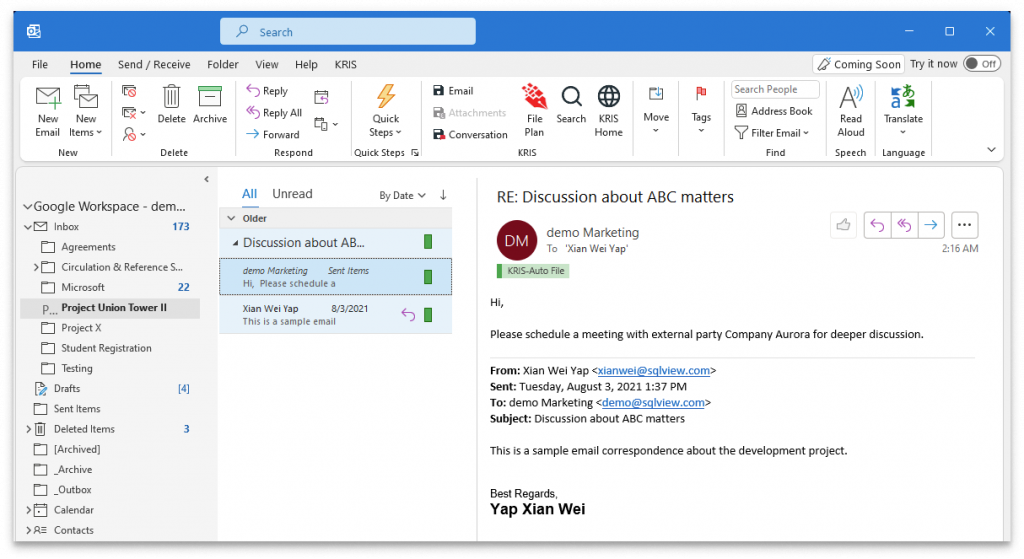
Scenario 3: When a user replies / forwards an email thread that is being auto-filed
- Click on Reply or Forward on an email that is tagged with “KRIS-Auto File”
- Compose your email message
- Click on Send. SMO will not show any mandatory filing prompt. Instead, SMO will file the email to the same file reference as the rest of emails in the conversation.
Scenario 4: When a user composes and replies to an email when not logged in to SMO
When you are not logged in to SMO and have sent an email, SMO will tag the email with an orange “Pending” tag. This helps you to track which are the emails that you need to review for filing the next time you log in to SMO.

To quickly retrieve the list of emails that are tagged with “Pending”, you can either:
- Use the “Pending” icon on the KRIS tab
- Click on the KRIS tab in Outlook
- Click on the Pending button under the Search subcategory

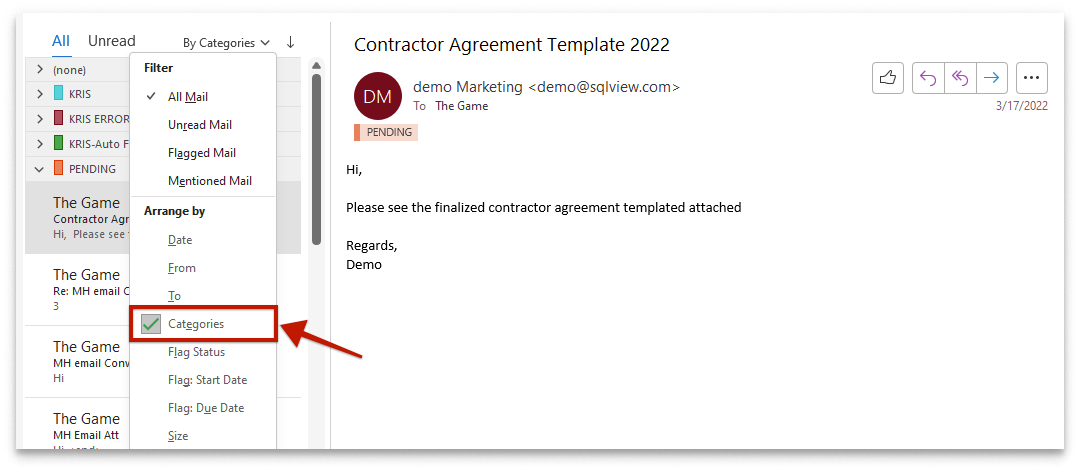
- Organise the Sent Items according to categories
- Click on Sent Items
- Change Outlook’s default setting to Arrange By > Categories to group them by Pending tag
