
Filing Documents via KRIS DI
KRIS provides a desktop filing assistant “KRIS Desktop Integration”, also known as KRIS DI, to facilitate easy uploading of documents from your desktop.
KRIS DI also allows you to perform batch filing such as multiple documents into a same folder without opening the KRIS web application.
It also has built-in functionalities such as auto-login capabilities to remember user credentials, resume connection to KRIS Records Manager if there is any disconnection, and automatically check for updates and applies any updates that it finds.
Signing in KRIS DI
Once the KRIS DI application is installed in your computer, there will be two icons found on your computer’s desktop.
 The KRIS DI icon to allow you to launch the application.
 The KRIS folder on the Desktop where you drag and drop / copy and paste the document that you want to file in.
KRIS DI has an indicator sitting in the System Tray. System Tray is on the bottom right hand concern of your screen.

There are 2 status of the indicator as described below.
 indicates that you have signed in to the system and ready to do filing.
 indicates that you have not signed in to the system.
- Double click on this KRIS DI icon on your desktop to launch the login screen.
- Login to KRIS DI by enter your username and password to start filing documents from your desktop to KRIS.

Filing Method #1: Drag Documents to KRIS Folder
Once you have login to KRIS DI, you can Drag & Drop documents into the KRIS folder on your desktop.
You can also pin the KRIS folder shortcut onto the Quick Access Menu in the Windows Explorer for easy filing of documents from your desktop, personal folders or network drives directly to KRIS
Note: Using the Drag & Drop method will remove the file from the original location.
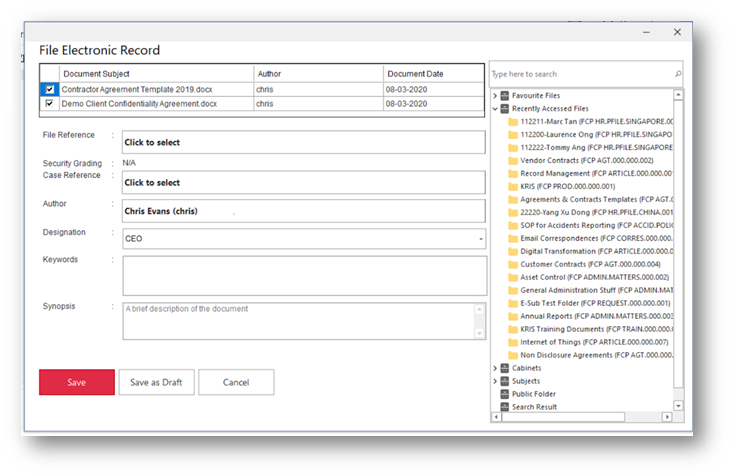
The system will prompt for profile form of the selected documents.

The mandatory fields are auto populated by the system and you only need to do is to select where you want to file these document to in KRIS.
- Click on File Reference field.
- Expand the KRIS File Classification Plan Tree and select a folder
- Alternatively, you can enter a keyword and hit Enter to search for folders.
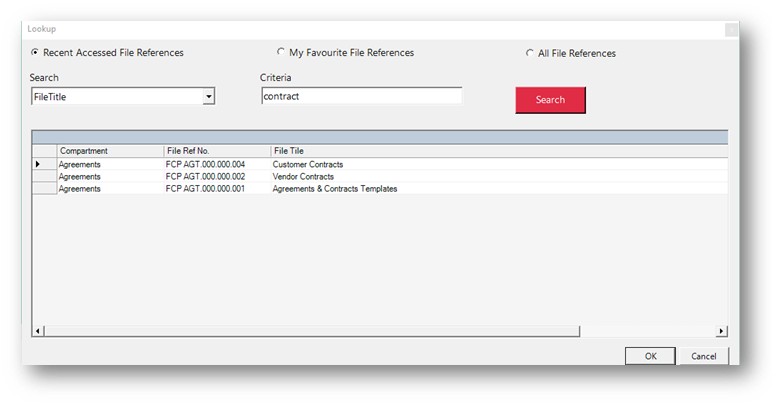
- Select a folder from the search result and click on OK button
- Click on the Save button to file to KRIS.

You can also save the documents as Draft Records in KRIS by clicking the Save As Draft button instead of the Save button.
A Draft Record in KRIS refers to a working document that is not ready to be published and accessed by other users.
As a working document in the system, it allows you to edit and create document version at your own pace. You get the full control of the Draft Record as it is only visible to you and the one you are filing on behalf of.
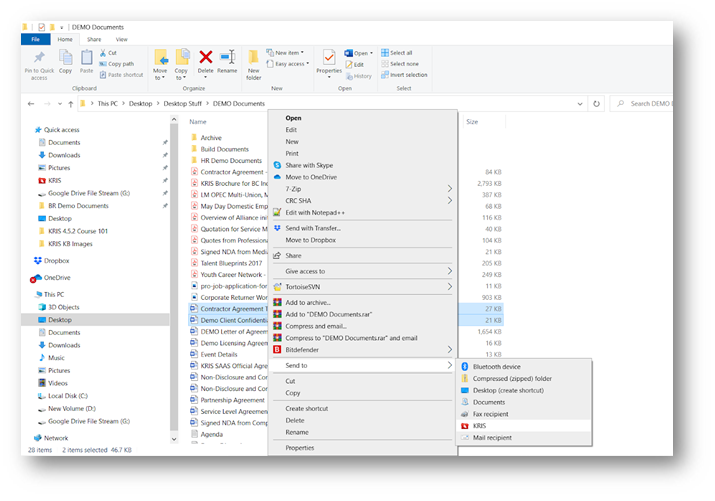
Filing Method #2: Right Click Menu – Send to KRIS
This method allows you to file documents anywhere in your computer without the trouble of locating the KRIS folder and dragging documents to it.
- Select the documents and right click
- Select Send to -> KRIS to start filing to KRIS
- Click on the File Reference field and select a folder in the File Classification Plan for filing.
- Click on Save button to file to KRIS.
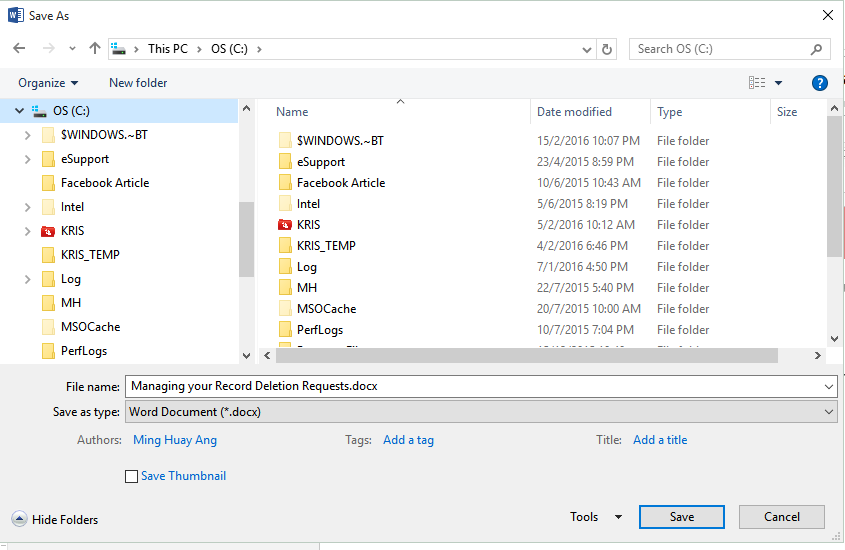
Filing Method #3: Save As option in Other Application
Once you have signed in to KRIS DI, you can save the document directly from the application after making any changes to the document.
- Simply, click on the Save As function in any application and look for KRIS folder in C:\KRIS. The KRIS folder shortcut can also be found in the Quick Access Menu in the Windows Explorer.
- Click Save button in the Save As pop up window.
- Click on the File Reference field and select a folder in the File Classification Plan for filing.
- Click on Save button to file to KRIS.