Creating a Physical/Hybrid File Reference
Physical Records are records that we can touch. They take up physical space, such as records or paper or media such as CDs.
Each organization handles the storage of physical records differently. They may keep some records in the office. This location is sometimes called a file room. We often do this if we need records for reference.
Other organizations may own and manage their offsite facilities for storage. Still, others may outsource the storage of their records. Or, an organization may use both types of storage.
To create a Physical/Hybrid Subject File,
1. Click on Classification Tab for e.g. Subject in Manage File Reference module
2. Click on > to expand the classification.
3. Right click on the Subject where the new File Reference is to be created and select Add Subject File
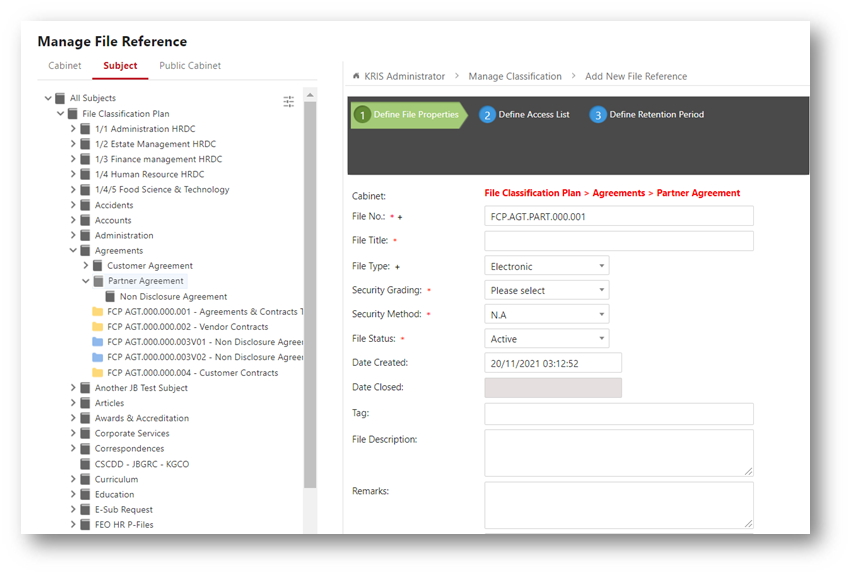
4. Filling in the compulsory fields (*) File Reference’s Details esp. the field below
*File Type – The type of records in the File Reference. It is defaulted to Physical/Hybrid.
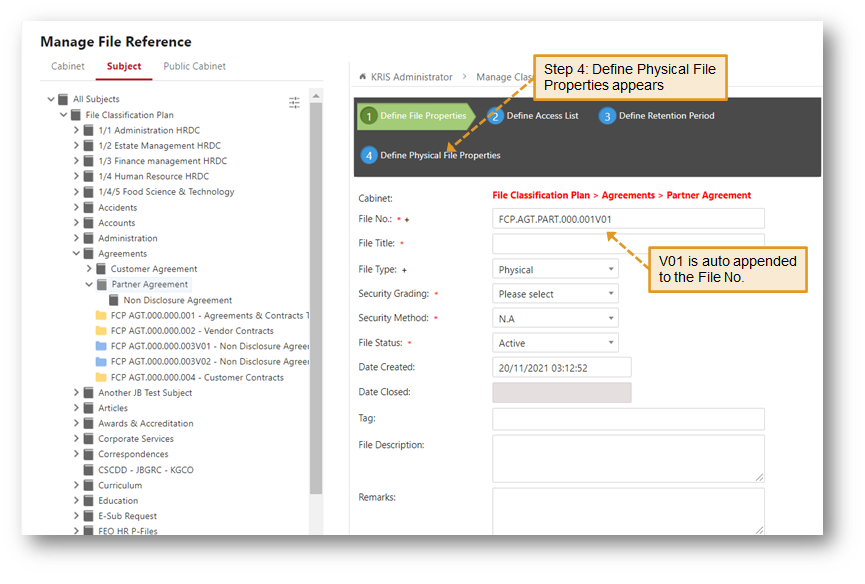
Once the File Type is changed to Physical/Hybrid,
- Step 4 : Define Physical File Properties will appear at the top.
- V01 is added to File No which indicates this is the first volume of a physical file reference
The format of the Volume numbering can be configured at the System Settings -> Classification Settings
5. Click on Next Step button to go to Step 2: Define Access List
- In Define Access List, Inherited Roles from the Parent Subject will be auto populated in Chosen Roles list if they match the selected Security Grading. Click on Individual section to grant specific users the right to access this folder
6. Click on Next Step button to go to Step 3: Define Retention Period
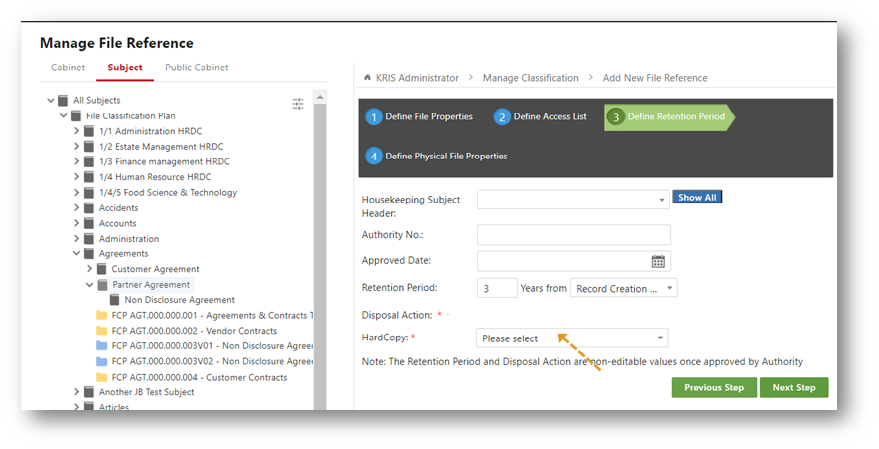
7. For Physical File, enter the Retention Period and Disposal Action – Hardcopy
- Retention Period – The duration to keep the records in the File Reference (in Years).
- Disposal Action – The action to be taken after the expiry of the Records
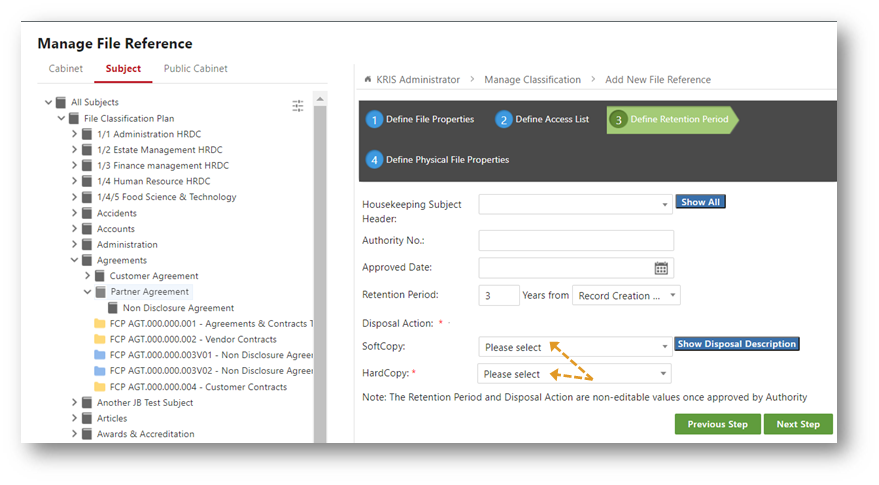
For Hybrid File, enter the Retention Period and Disposal Action for both Hardcopy and Softcopy
8. Click on Next Step button to go to Step 4: Define Physical File Properties.
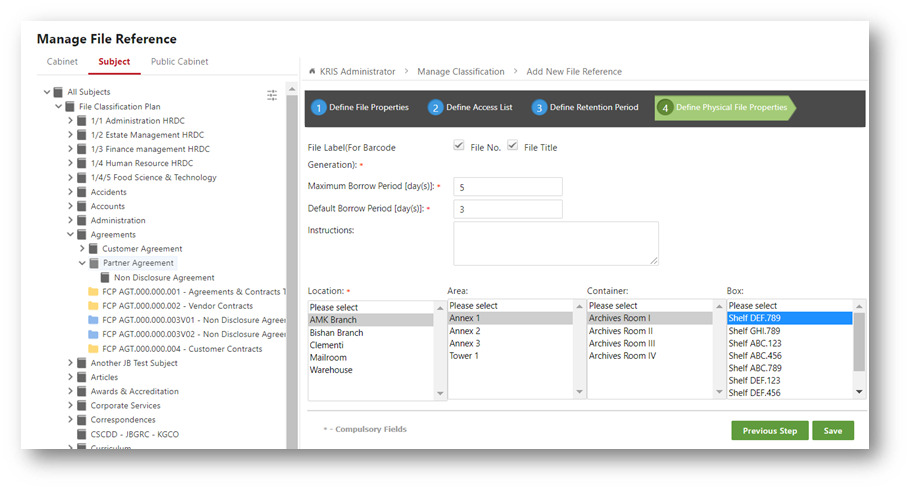
9. Click on Save button to save the changes
10. Click on OK button to close the Success Message window.
