Configuring a Workflow Administrator
The Workflow Administrator is the person who is able to view all the submissions in that one particular Workflow Template only (e.g. ‘For Approval’) for submissions that he administers. As the Workflow Administrator, he is able to add the Covering Officer to any of the open submissions under that Workflow Template.
Only the System Administrator has the rights to configure Workflow Administrator.
Adding Workflow Administrator(s) to a Workflow Template
- Login as the System Administrator.
- Click on the Module Switcher at the top bar and select E-Submission module.
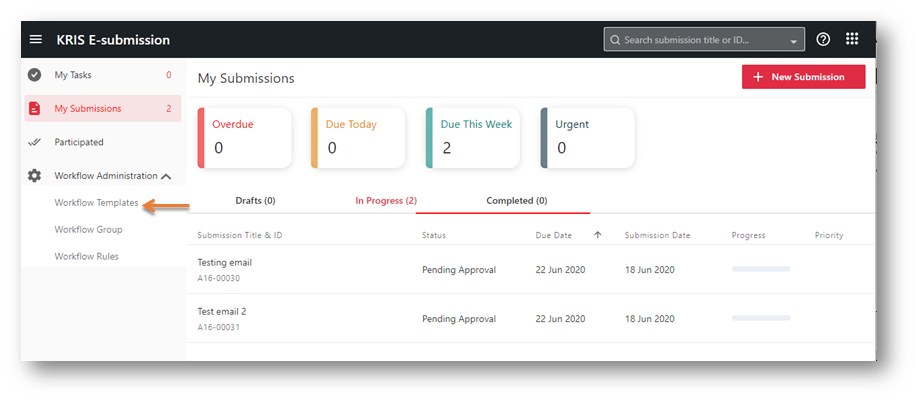
- Click on the Workflow Administration menu at the Action Menu Panel.
- Select Workflow Templates option.
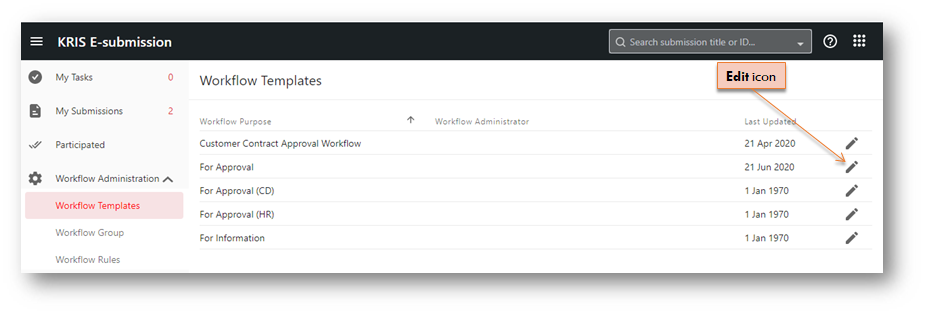
- Select the Workflow Template to set the Workflow Administrator by clicking on the Edit icon.
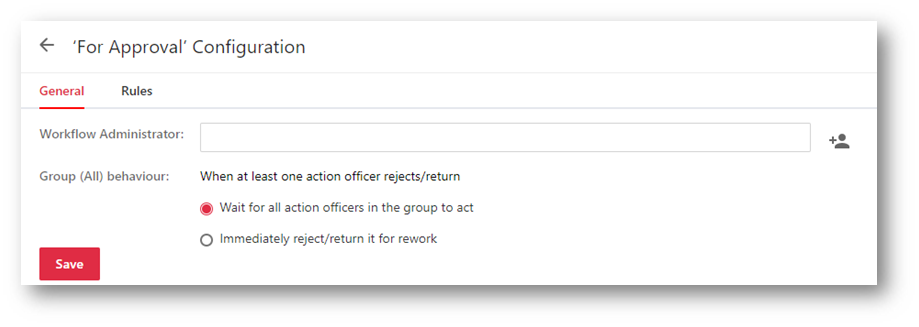
- Click on the Add User icon
 .
. 
- Select a few users to be the Workflow Administrator and click on Add Selected button.
- Click on the Save button.
The newly added Workflow Administrators will be listed the Workflow Template page.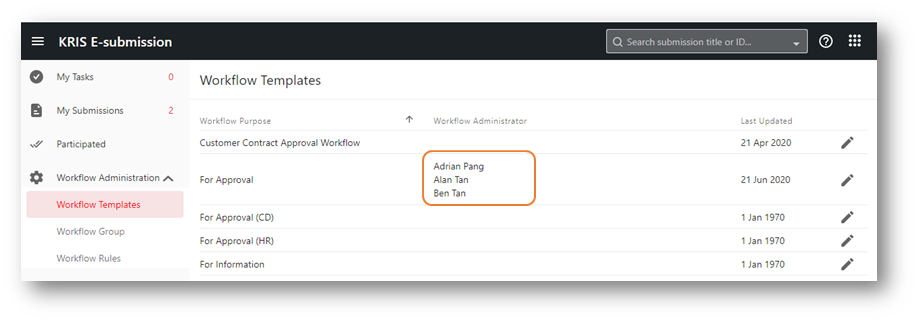
Removing Workflow Administrator(s) from a Workflow Template
- Login as the System Administrator.
- Click on the Module Switcher at the top bar and select E-Submission module.
- Click on the Workflow Administration menu at the Action Menu Panel
- Select the Workflow Templates option.
- Select the Workflow Template with assigned Workflow Administrator(s). Click on the Edit icon.
- Click on the Delete icon X to remove the selected Workflow Administrator.
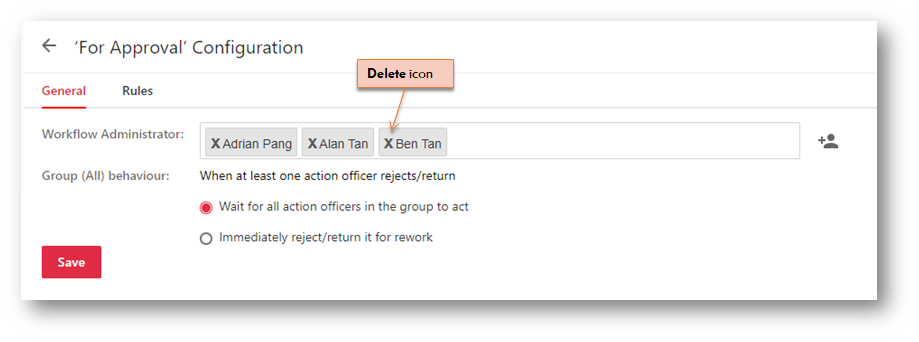
- Click on the Save button to save the changes.
